This post originally appeared under the title “ec2dns 2.0 - DNS for EC2 instances” on April, 29th 2015 on the fruux blog.
Back in 2012 we released the first version of ec2dns, a set of command line tools that makes it easy to display public hostnames of EC2 instances and ssh into them via their tag name.
EC2 instances have random hostname like ec9-99-99-99-99.compute-1.amazonaws.com. These hostnames are quite hard to remember - that’s where our tool comes into play. All you have to do is to assign Nametags to your servers, e.g. appserver-1.
Previous versions of ec2dns provided wrapper commands like ec2ssh and ec2scp.
Example for the ec2ssh wrapper
$ ec2ssh appserver-1
To make interacting with EC2 instances even easier, we’re going one step further with todays release of ec2dns 2.0, which finally justifies the dns part in the name ec2dns.
Version 2.0 has a built-in DNS server
The wrapper commands are still included, but with the built-in DNS server of ec2dns 2.0 working with EC2 instances is now even better - all you need to know is the Name tag of the instance and add .ec2 to it. Amongst various bugfixes and optimizations ec2dns 2.0 has also been migrated to aws/aws-sdk-php v2.
Some usage examples
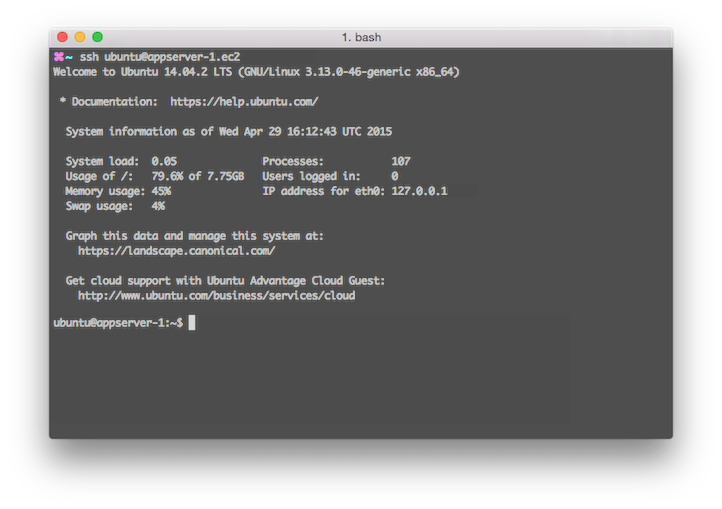
SSH into an instance via its name tag
$ ssh appserver-1.ec2
Copy a file from an EC2 instance onto your machine
There are a few prerequisites, but aside from them setting up ec2dns is done with just one command.
$ composer global require "fruux/ec2dns=~2.0.0"
If you want to use the DNS feature, you’ll just have to make sure that the ec2dns server is running on your system (we have instructions for OS X) and used to resolve anything with the .ec2 TLD.
ec2dns is on GitHub. Check the README.md file if you want to learn more or have a closer look at the installation and update instructions.
Open source at fruux
fruux is powered by a ton of open source software, but we also release a lot of open source software ourselves. ec2dns is really just a tiny example. With sabre/dav and our other sabre/* projects all of our core technology is open source, too and heavily used not just in our own product, but also powers sync features in great products from companies such as Atmail, Box and ownCloud.
I hope that ec2dns (or any of our other open source projects) will be useful for you. Perhaps we’ll even see you as a contributor on GitHub soon. :-)
Any comments? Ping me on Twitter. 👉🏻 Get my newsletter for occasional updates. ✌🏻
This post originally appeared under the title “Why the new 2015 EU VAT rules are actively harmful to startups” on March, 24th 2015 as a guest post at tech.eu.
Seven years ago, in February 2008, the Council of the European Union approved Directive 2008/8/EC to little fanfare. Now, seven years later, this directive is back to haunt European startups on a massive scale with its new VAT (Value Added Tax) rules on the place of supply.
The new rules in a nutshell.
With effect from 1 January, 2015 the place of supply for electronic services (also telecommunication services and broadcasting) provided to consumers is deemed to be the location of the consumer.
Previously the place of supply for e.g. a SaaS (Software as a Service) company providing its services to consumers would -in general- have been the location of the company.
The place of supply is important for tax purposes. It decides where the company is liable for VAT.
Under the old rules, it didn’t matter where a customer was located. A company would always have paid the local VAT rate in its own country, because the place of supply was at the location of the company (for example a german SaaS company would have paid 19% VAT on its sales to its local tax office, regardless if the customer is located in Germany, Italy, Austria or elsewhere in the European Union).
Under the new rules however, because the place of supply is deemed to be at the location of the customer, the company has to pay VAT to the foreign tax authorities (for example a German SaaS company selling to a German customer has to pay 19% VAT to its local tax office, but for its sales to Italian customers it has to pay 22% VAT to the Italian tax authorities, for sales to its Austrian customers 20% VAT to the tax authorities in Austria, and so on).
To comply with these new rules, companies either have to register in each country they are selling to and report their sales to this country or register for the MOSS (Mini One Stop Shop) scheme in their own country and file country by country reports there.
What is the idea behind these rules?
These new rules are designed to prevent so called jurisdiction shopping. Under the old rules, multinational corporations (e.g. Apple) were able benefit from lower VAT rates, simply by deciding where they incorporated their European distribution subsidiaries (e.g. iTunes S.à r.l. in Luxemburg). The new rules prevent this jurisdiction shopping -at least for VAT purposes- as companies are always liable for VAT in the country of their customer and with the VAT rate of that country.
These new rules are harmful to startups.
One might think that companies had seven years to prepare for these new rules, but many aren’t even aware due to the extremely poor communication of tax authorities and governments. But even if companies would be largely aware, startups typically neither have the manpower in-house, nor an army of consultants and tax advisors to take care of the extra burden generated by these new rules – unlike multinational corporations, where even the headcount of the in-house tax department typically surpasses the total headcount of an early stage startup.
A startup is a company designed to grow fast. To achieve this growth, they will often sell internationally right from the start and because of this run into the brick wall of international tax compliancy way before they are prepared to deal with this complexity.
The Mini One Stop Shop doesn’t fix the problem.
With the MOSS scheme companies don’t have to report and register in each and every country they are selling to, but they still have to report their per-country sales to the MOSS in their own country. In Germany the competent authority is e.g. the Federal Central Tax Office.
Admittedly, reporting country-by-country sales to the MOSS instead to each and every country is a lot less complex, but companies are still severely affected by these new VAT rules:
Requirement to ask customers for more data during checkout, which negatively affects conversions.
Additional work to compile country-by-country reports (and often no easy way to automatically gather this data from payment processors).
Development time for invoice handling instead of product features.
Additional work for tax advisors resulting in higher costs for companies.
More admin overhead with separate MOSS filings in additional to normal tax reporting.
Bottom line: startups are currently forced to burn precious time and money that would be way better invested in building a great product and finding the right customers for it.
How to fix VAT for EU startups?
One easy way to fix this would be to exempt companies with sales below a certain threshold from these rules – similar to the exemption for the supply of goods up to the threshold of 100,000 EUR in Article 34 in Directive 2006/112/EC. Up to this threshold companies would pay VAT on their consumer sales in the country they are located.
A threshold would allow startups to focus on building great products and investing their time and energy in their growth, but also effectively prevent big multinationals from jurisdiction shopping and ensure that VAT yields get distributed fairly between countries within the European Union.
Any comments? Ping me on Twitter. 👉🏻 Get my newsletter for occasional updates. ✌🏻
With this latest policy, outdated and vulnerable protocols such as SSLv2 and SSLv3 are disabled, server order preference is used and outdated vulnerable SSL ciphers such as RC4 are disabled. In tandem with HTTP Strict Transport Security (HSTS), this is a pretty solid setup for your ELB.
But there is a catch.
If you still have users stuck with Windows XP their computer won’t be able to negotiate any cipher it supports with your load balancer, so all of these users are unable to use your service.
The bad option: Use ELBSecurityPolicy-2014-10
Using ELBSecurityPolicy-2014-10 enables the ECDHE-RSA-RC4-SHA and RC4-SHA ciphers, which are supported by Windows XP. Unfortunately RC4 is vulnerable (e.g. Mozilla and Microsoft as well as many others recommend to disable it where possible) and should be avoided at all cost, both to keep users safe as well as to maintain a good rating in your SSL Labs Report.
The good option: Configure your own Security Policy
If you have to support Windows XP clients, you can’t use ELBSecurityPolicy-2015-02 and you don’t want to use ELBSecurityPolicy-2014-10 because it’s weak. Luckily there’s the DES-CBC3-SHA cipher, which is supported by Windows XP and still considered secure.
To use that, you have to create a Security Policy for your load balancer and then activate it for each listener. This can be done with the AWS Command Line tools in two commands.
Update (March, 18th 2015)
The new AWS provided policy ELBSecurityPolicy-2015-02 also solves this issue:
To create the security policy (you’ll have to repeat this step for each of your load balancers) run the following command. Make sure to set --load-balancer-name, --policy-name and --region correctly.
Now activate the new policy for all of your HTTPS listeners on your load balancers. Make sure to set --load-balancer-name, --policy-name, --port and --region correctly.
That’s it. Now you have a secure SSL configuration for your ELB and still support Windows XP. We use this configuration at fruux (here’s our SSL Labs Report).
Any comments? Ping me on Twitter. 👉🏻 Get my newsletter for occasional updates. ✌🏻
A few days ago a nonprofit foundation, partly backed by Stripe, launched a new decentralized payment network (similar to Bitcoin) called Stellar. Unlike with Bitcoins Stellar doesn’t get mined (so maybe the vast amount of computing power of all this mining hardware could get used to sequence DNA or run SETI@home in the future) and Stellar supports transactions in arbitrary currencies via so called gateways. To learn more about Stellar, their launch blog post and Stripe’s blog post is probably a good starting point.
Another interesting feature of Stellar is federation.
What federation is about
Each Stellar user has both a wallet address (similar to Bitcoin) as well as a human readable username for that address (which is quite handy as sending a payment to e.g. watsi is a lot easier than sending one to gN4oHfh4iLRCSsrHVxVHzt6rZXs6EyTCe4). What’s nice about these usernames is that they are actually federated addresses and not just usernames. The username watsi is just the short version of watsi@stellar.org.
Stellars federation protocol makes it possible to set up federated addresses for your domain. That means, that if you control the domain example.org, you could receive payments under e.g. john.doe@example.org. Think about it like some kind of domain name system for wallet addresses. Stripe’s CTO Greg wrote a blog post with some more details about how federation works and also provides a link to his sample federation server there.
How a client figures out the recipients wallet address
Just to give you a rough idea, here’s a quick overview of how a Stellar client figures out the recipients wallet address.
Locate and parse stellar.txt
When you are trying to send Stellar to e.g. john.doe@example.org the client first tries to find a file called stellar.txt for the example.org domain by trying the following URLs in this order:
https://stellar.example.org/stellar.txt
https://example.org/stellar.txt
https://www.example.org/stellar.txt
If the file is found, the client parses it for the URL of the federation server that’s responsible for this domain. For this example the contents of that file might look something like this:
Now the client makes it’s final request and asks the responsible federation server for the wallet address of john.doe@example.org. If everything worked out as expected and the federation server actually knew that user, the client now knows the wallet address for john.doe@example.org and is able to send a payment.
Running your own federation server
To run your own federation server you’ll need a valid SSL certificate for both the server where your stellar.txt file is located as well as for the domain your federation server itself is running on (those two could of course be the same). If you are also curious about Stellar federation you can give my implementation (it’s on GitHub) a try.
Disclaimer
A quick word of warning: I put this together for fun and haven’t spent a lot of time with it, so please use it at your own risk and don’t sue me if you end up sending your life savings to /dev/null. :) The federation protocol itself also still seems to be evolving, so things might break when they change the protocol.
Let me know if you find bugs or have suggestions for improvement.
Any comments? Ping me on Twitter. 👉🏻 Get my newsletter for occasional updates. ✌🏻
Like previous versions of OS X, 10.10 also ships with PEAR. Installing and activating it is easy. Once that’s done PEAR and PECL work as expected (if you also want to set up and install Apache, PHP and MySQL, check this post).
Installing PEAR
cd /usr/lib/php
sudo php install-pear-nozlib.phar
If that fails
autoconf may be missing. To install it just use Homebrew. Once Homebrew is installed, installing autoconf is as simple as:
brew install autoconf
After autoconf is installed, try running the pear installer above again.